This is my first VMware blog and is going to be all about the recently released vRealize Operations Manager Tenant App for vCloud Director. This is a great way to expose vROps performance metrics to tenants in a vCD environment and allow them to only see metrics relevant to their organization. vCD 9.x has been a revolution in the way vCD is evolving and before you say vCD is dead, go to this great blog by Daniel Paluszek and read all about how it is not! This is an awesome way for providers to give their tenants more visibility into the performance of their environments and will help the tenants to do more of the first line maintenance themselves. They will also feel comfortable being able to see first hand what is and isn’t performing in their cloud.
So onto the setup of the Tenant App. There are three main parts to getting this done, installing an AMQP broker, installing the App and configuring vCD and vROps.
Before we get into the nitty gritty, we need to download the Management Pack and the Appliance. You can find both of them here. You get the management pack by clicking the green ‘Try’ button to the right of the screen, and the appliance .ova by clicking ‘Appliance: vRealize Operations Tenant App for vCloud Director’ in the list of resources.
Installing an AMQP Broker
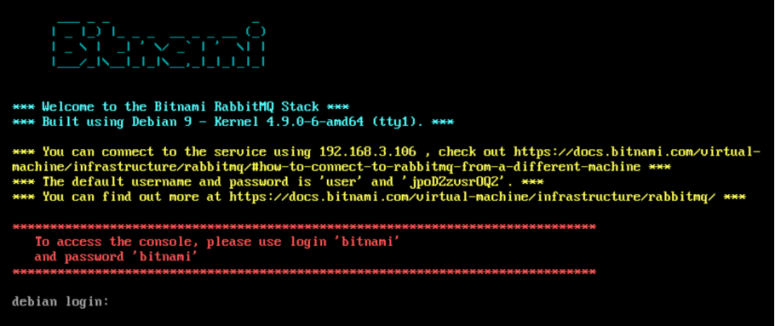
For this part I wanted to use something simple and pretty much out the box and bitnami have a great pre-built VM in .ova format that is just that. It is an install of the tried and trusted RabbitMQ and you can go here to get it. Deploy the .ova and start it up. Once it is done with it’s setup during boot, you will get a screen something like this in the console:
Log into the console using ‘bitnami’ and ‘bitnami’. You will be required to set a new password during the login process.
We are going to configure the firewall first to allow access to the Management Portal and the application itself. Execute the following at the prompt
sudo ufw allow 15672/tcp
sudo ufw allow 5672
15672 is the port for the RabbitMQ Management Panel and 5672 is the default RabbitMQ Application port.Print out the fire wall rules and they should look something like this:
Next we need to allow connections to RabbitMQ. By default, RabbitMQ only accepts connections from the local host.
Stop the RabbitMQ service
sudo /opt/bitnami/ctlscript.sh stop
and edit the configuration file
sudo vi /opt/bitnami/rabbitmq/etc/rabbitmq/rabbitmq.config
You need to change the tcp listener to accept connections from all or certain IPs depending on your environment. I setup my instance to accept connections from any IP. Change 127.0.0.1 to 0.0.0.0 to allow any IP to connect. Below are the before and after edits.
Finally, restart the RabbitMQ service
sudo /opt/bitnami/ctlscript.sh startNext we need to configure the RabbitMQ server. We are going to do this from the Management Panel. Connect to http://<YourServerIP>:15672 and use the username and password from the console splash screen.
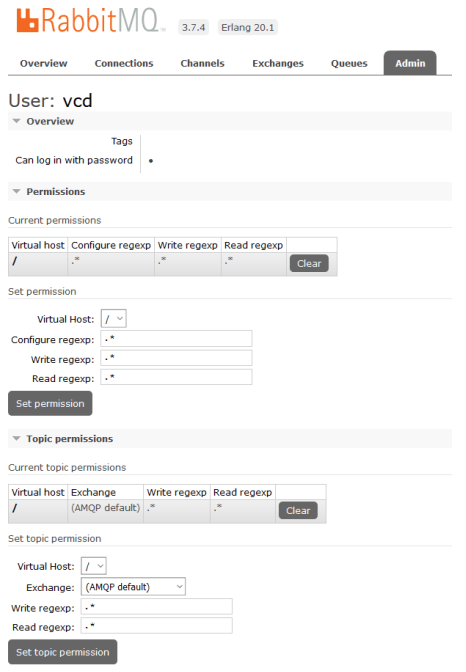
In my case it is ‘user’ and ‘jpoDZzvsrOQ2’Once into the Management Panel, click the ‘Admin’ Tab and then click ‘Add a user’. I created a user called ‘vcd’ and entered a password and clicked ‘Add user’.
The ‘vcd’ user is now in the list. Click it to configure the permissions. I used the defaults and just clicked ‘Set permission’ and ‘Set topic permission’ to allow the user to access the Virtual Host and AMQP default exchange.
With that, you are all set with the RabbitMQ configuration.
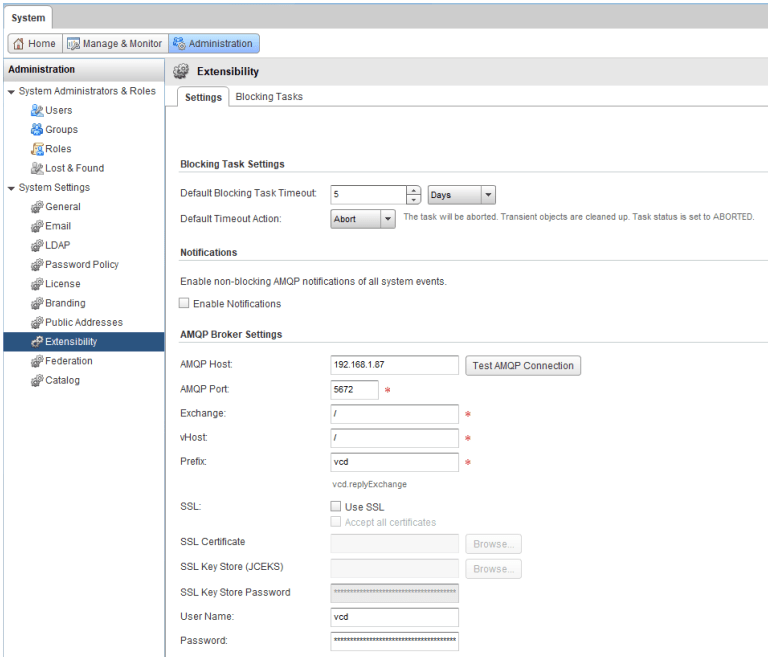
Let’s get vCD connected up. Connect to the flex client (you cannot do this in the HTML5 client just yet) and go to Administration -> Extensibility and configure the AMQP Broker Settings. Below is what I configured in mine : (Remember to click the Test AMQP to ensure all is good)
And now vCD is wired up to the AMQP Broker.


Installing the vROps Management Pack
Log into vROps as the admin and go to the Administration -> Solutions page. Click the green plus to add a solution and select the .pak file you downloaded earlier. Once the install is completed, click the Configure gears icon and enter your vCD instance details. Mine looks something like this:
Make sure to test the connection to confirm all is working.And that is it for the installation of the Management Pack.

Deploy the Appliance
The final step is to deploy the appliance and register the plugin with vCD. Deploy the Appliance .ova file you downloaded earlier and be sure to configure all the settings correctly during the deployment process. These settings are difficult to change after deployment and if you need to change anything, you are pretty much better off just redeploying. (As of writing this blog, deploying the appliance from the vCenter HTML5 client does not work so you need to use the flex client.)
Once the deployment is done and you start the VM, you should see the URL to connect to in the console.
The final piece of the puzzle is to register the plugin with vCD. You do this from the console of the Tenant App you just installed. Connect as root and run
cd /opt/vmware/plugin
python publish.py -H vcd-dc1-001.local -u administrator@system -p <YourAdminPassword>
Note that you must use administrator@system as the username and not administrator@vsphere.local.
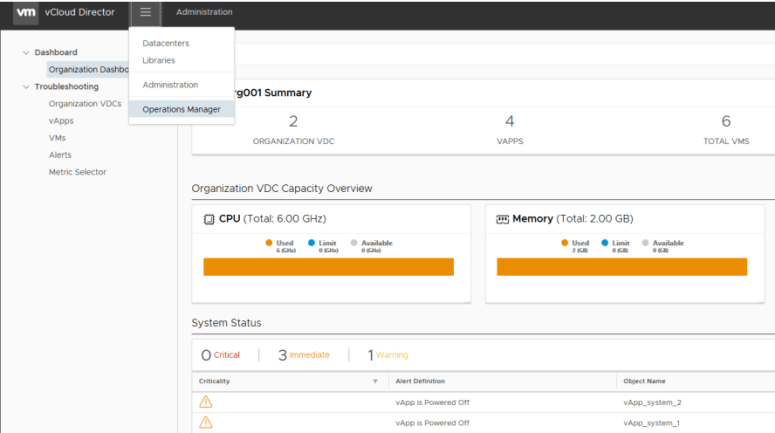
And that’s it! You should now be able to log into the HTML 5 vCD portal and open the Operations Manager screen. Mine looks like this: