vRealize Operations Manager has a similar process to installing certificates that we went through with vRealize Log Insight with one minor tweak. When creating the PEM file to be loaded into the appliance, you need to make sure you have the order of the certificates correct in the file. If they are not correct, the PEM file will not be validated and you will be unable to proceed. The file also needs to have a .PEM extension.
Again you will need to have openssl installed to produce the keys and CSRs for this process. If you don’t have it, go here to get it. In the examples below, when I execute openssl commands from the command prompt, I am not showing paths. Depending on your installation of openssl and where you are executing from, you may need to add paths before the openssl command and file names in the command.
Step 1. First we going to generate a 2048 bit key. The key is placed into a file called vrops-dc1.key. This file will be used to generate the CSR as well as being loaded onto the Log Insight instances later in the process.
openssl genrsa -out vrops-dc1.key 2048
Generating RSA private key, 2048 bit long modulus
……………………………………………………………………………+++
…..+++
e is 65537 (0x10001)
Step 2. Next we are going to prepare a csr (Certificate Signing Request) This file is submitted to the Certificate Authority and used to create a signed certificate.
The vrops-dc1.cfg file looks like this:
[ req ]
default_bits = 2048
default_keyfile = vrops-dc1.key
distinguished_name = req_distinguished_name
encrypt_key = no
prompt = no
string_mask = nombstr
req_extensions = v3_req
[ v3_req ]
basicConstraints = CA:FALSE
keyUsage = digitalSignature, keyEncipherment, dataEncipherment
extendedKeyUsage = serverAuth, clientAuth
subjectAltName = DNS:vrops-dc1, DNS:vrops-dc1.local, DNS:vrops-dc1-001, DNS:vrops-dc1-001.local, DNS:vrops-dc1-002, DNS:vrops-dc1-002.local, IP:192.168.20.30, IP:192.168.20.31, IP:192.168.20.32
[ req_distinguished_name ]
countryName = US
stateOrProvinceName = NY
localityName = Pittsford
organizationName = VMWare
organizationalUnitName = VCPP Sales
commonName = vrops-dc1.local
In my lab I have 2 Operations Manager servers behind a OPNsense load balancer. In order to be able to connect to the instance using the VIP as well as directly to each of the instances without a certificate error, I have added the VIP and the IPs of each instance as well as the short and long names.
Execute the following. The CSR file will be called vrops-dc1.csr and is what must be shipped to your Certificate Authority.
openssl req -new -key vrops-dc1.key -out vrops-dc1.csr -config vrops-dc1.cfg
Step 3. From here we need to get the CSR signed by our lab CA. See Part 2 of this series to find out how. The output of that process will be a .cer file that has the signed certificate. Make sure you also get a copy of the CA’s root certificate as you will need it in Step 4. See Part 1 of this series to get the CA Root certificate if you don’t already have it.
Step 4. We now need to combine the Key generated in Step 1 and the CA Root Certificate and the .cer file produced in step 3. As I mentioned in the intro, it is important to put the pieces into a .PEM file in the correct order. Make sure to save it with a .PEM extension. Use a text editor to create a new file and place the contents of the signed certificate (from Step 3) into it. Next open key file (from Step 1) and put it after the certificate. Lastly, put the CA certificate (and any intermediate CA certificates) into the file and save it. It should look something like this:
—–BEGIN CERTIFICATE—–
MIIFlTCCA32gAwIBAgITdgAAABZtfJXdkMVXVAAAAAAAFjANBgkqhkiG9w0BAQsF
ADAQMQ4wDAYDVQQDEwVMYWJDQTAeFw0xODA1MDMxMjE3MTdaFw0xOTA1MDMxMjI3
MTdaMG4xCzAJBgNVBAYTAlVTMQswCQYDVQQIEwJOWTESMBAGA1UEBxMJUGl0dHNm
b3JkMQ8wDQYDVQQKEwZWTVdhcmUxEzARBgNVBAsTClZDUFAgU2FsZXMxGDAWBgNV
….
….
k1qa8JtHuZoL1ABjoMt2Wt4617SPwSKx/7ISp18Okvs49GL5OpDWJd2qhTsxtCmG
MRRlUbaxq3ldP55lGhAWVMLHbw/DOS3Ja6dCQbSjF8z97AT0vaipgl3vElkwqThd
2+TvTMZzRWVoA5UGftPaqRILh4C65OqGYND4hpK28MA26GgB3rETef7Vf9oksRZv
BgCB7S+ZwuVlYyJIfadUHInpStcOSLpsz7/sNNEdGKPUr4BidQUkKSk=
—–END CERTIFICATE—–
—–BEGIN RSA PRIVATE KEY—–
MIIEogIBAAKCAQEAnSUgrV6MpS39uvtz2/VNpY+BmdI9CZaShD+94tbvI1V4QreP
XaC1jZy6AReB2libopO4kFVTGfP3kLpIfoarvZlqtkwmNraJ/tm5pt4R3L/ESLk7
A6Hs0Qv4uHe0oTDY+cu6VTeuP6GaowlPpTKYx1gmg49srxk4U6W9xYRvaIPw4iW3
dE9OHqB05MD5mYwFOPPH8YhpihxWX4bG6+fdj2ZzJme1dlY9o1qmEbolCluAGjnh
….
….
z0k17KSa/ruNv2nnnY15ntKu2hPWBn9Jf9m8zYK1gfW+e0H8NaCHqOBAE+8YrrcD
UUoFAoGAJ17yakk7R6LcCEVX6hjnBUHyNR6mueDh/ItLIQoP3/sQ5mkCF/LMdyZO
x38Ys+FPzdf065dUCdKfGBfDxH6ZeQChyQSPQK2IGXwDP5QTOe/khCzHMh4Z/38G
JHUO9AAWsiAu8iY3bD+ZBwNrNE2CbnkbcSie4EbsISX6AJ6c3FY=
—–END RSA PRIVATE KEY—–
—–BEGIN CERTIFICATE—–
MIIE+zCCAuOgAwIBAgIQawsxF90J0r5JtCHLqV7awjANBgkqhkiG9w0BAQsFADAQ
MQ4wDAYDVQQDEwVMYWJDQTAeFw0xNzEwMjYyMDM1NTBaFw0yNzEwMjYyMDQ1NDZa
MBAxDjAMBgNVBAMTBUxhYkNBMIICIjANBgkqhkiG9w0BAQEFAAOCAg8AMIICCgKC
AgEAv/PKRLqtgtWSS5fofsV4Bvniwzkiky8lPP7XCCG9ifdRy0eYpkM1y3Lnf0s6
….
….
eTrYP+eDerb910j0cvl9EpwkfizxKHznE/MBDXCseF1EqbIfAlokJyEyGRQp7Izf
vzMcx3oE5+BULe3kXMGUZppKDR2tmTG8E8v2I8liSKqjvkq3W5OBLHKRt+6O7Dx1
25YeFp7xN7dn6jjA9klYCCxYwKvLZg2dxWrfiw1+BuDJhzistLx1uVIAp1An0KGs
HGFxhql0/9jVqXyOmOMneU7lG5Spawik2NXCE3C0ow==
—–END CERTIFICATE—–
Step 5. Finally we are going to load the certificate into the vROps server. The great thing about vROps is there is a method to do this directly in the UI and all instances in the cluster automatically get the certificate so there is only one place that this needs to be done.
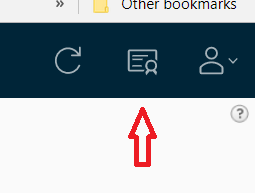
Connect to the admin UI by going to https://<YOUR_VROPS_URL_OR_IP>/admin. Click the certificate icon in the top right of the UI.
This opens a dialog to replace the existing certificate. Click Install New Certificate
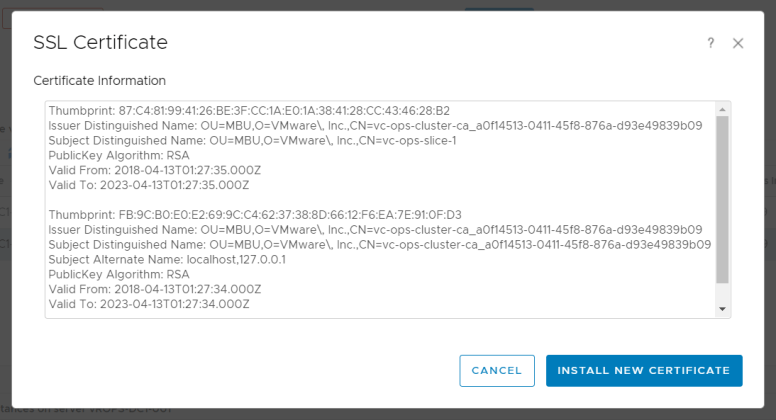
Click Browse and select the .PEM file you created.

Ensure the Certificate Information contains the details of the certificate you created earlier in Step 3. Click Install. Wait for the install to complete.
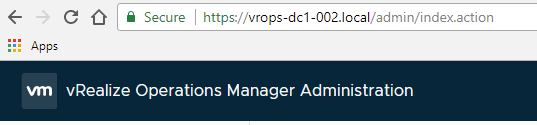
Step 6. Open a new browser session and point to the vROps instance. The browser should now show the site as secure.
In Part 5 in the series we will add certificates to vCloud Director.
